Fundus photography (retinal imaging) Diagnostic Imaging
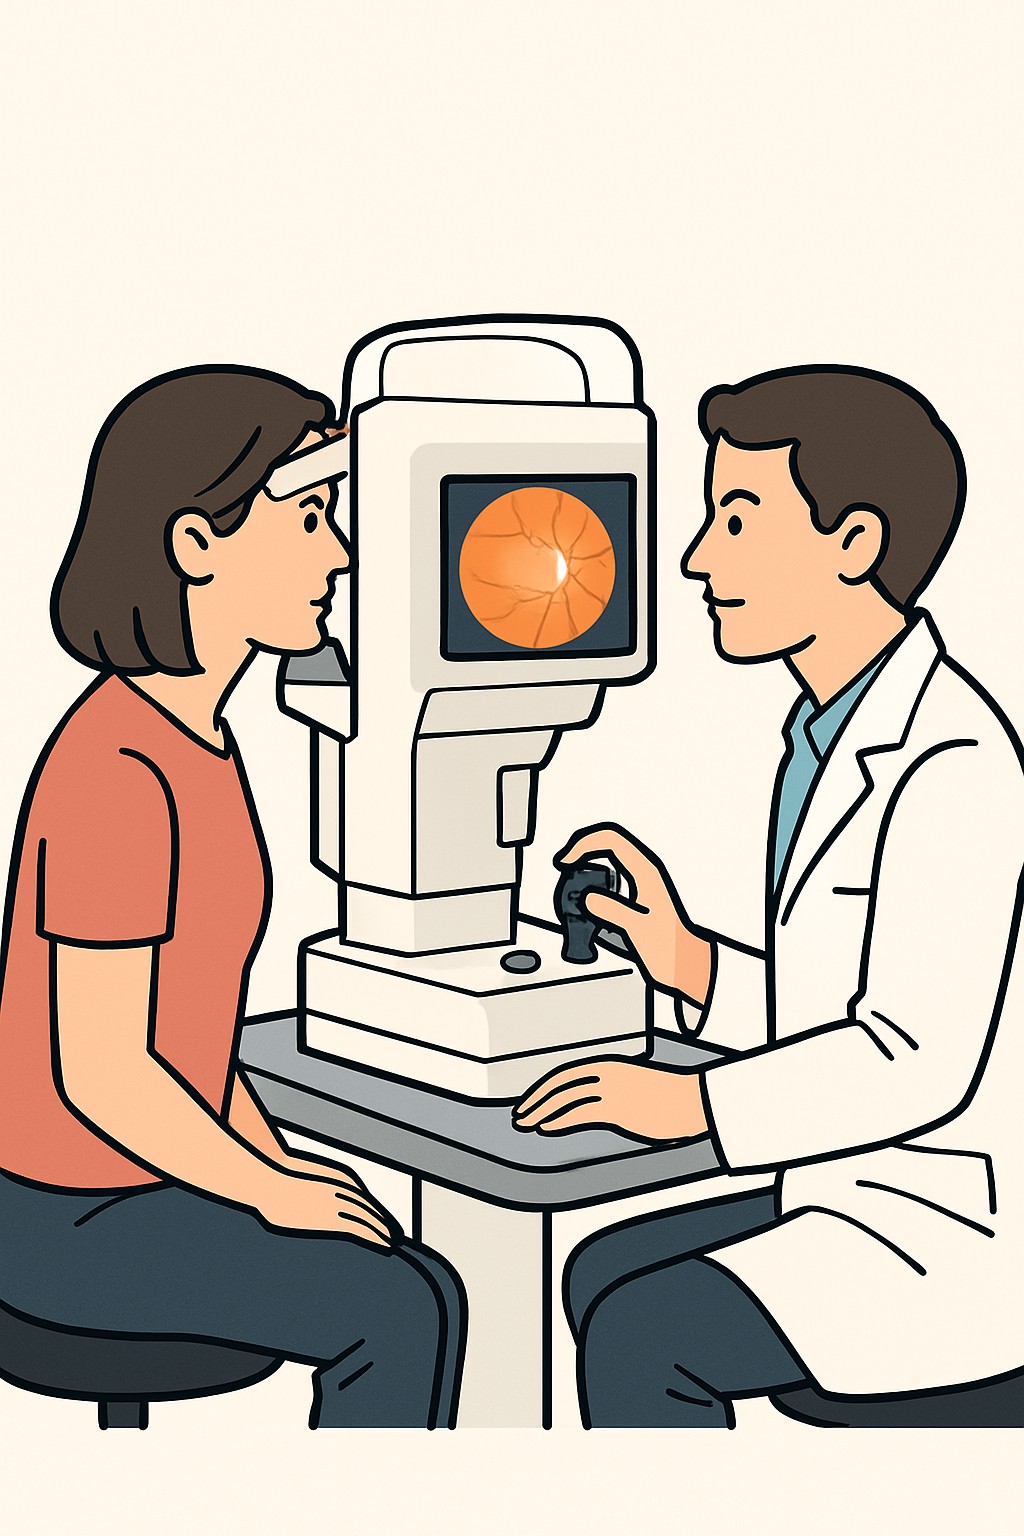
Fundus photography uses a special camera to take pictures of the back of your eye.
Overview
Fundus photography uses a special camera to take pictures of the back of your eye. These images show the retina, macula, blood vessels, and optic nerve. The photos help document eye health and track changes over time. Clinics use fundus photos to screen for eye disease, support diagnosis, and monitor treatment. The test is quick and noninvasive. Dilating eye drops may be used to widen the pupils for clearer images, depending on your eyes and the camera used.
Also known as: Retinal photos, Fundus photos, Retinal photography, Color fundus photography
Preparation & Next Steps
Everything you need to know before and after your procedure
Before Care
- Ask the clinic if dilating drops will be used so you can plan transportation and timing
- Bring sunglasses to reduce light sensitivity after the visit if dilation is planned
- Consider arranging a ride if you may be dilated and are unsure about driving afterward
- Bring your glasses or contact lens prescription to help with focusing during checks
- Avoid heavy eye makeup or oily eye creams that can smudge lenses during imaging
- Allow extra time (often 20–30 minutes) if dilation is needed before photos
- Have a list of your eye conditions, surgeries, and current eye medicines
- Bring previous eye images or reports if you have them for comparison
After Care
- Expect brief light sensitivity; use sunglasses outdoors if your pupils were dilated
- Near vision may be blurry for several hours after dilation; plan reading and screen time accordingly
- Avoid driving until your vision and light sensitivity have returned to your normal
- Do not rub your eyes after the test to avoid irritation
- Resume regular eye drops and medicines as instructed by your clinic
- Review results and recommended follow-up timing with the clinic
- Contact a clinician if you develop severe eye pain, persistent vision changes, or headache after dilation
- Keep copies of your images or reports in your personal health records when available
Clinical Information
Important medical details about this procedure
Indications
- Screening and monitoring for diabetic retinopathy
- Evaluation of age-related macular degeneration
- Documentation of glaucoma-related optic nerve changes
- Assessment of hypertensive retinopathy or retinal vascular disease
- Follow-up of retinal tears, detachments, or scars
- Monitoring uveitis or optic disc swelling (papilledema)
- Baseline images for comparison over time
- Evaluation of unexplained vision changes noted on exam
Alternatives
- Dilated eye exam with ophthalmoscopy
- Optical coherence tomography (OCT)
- Fluorescein angiography
- Fundus autofluorescence imaging
- B-scan ocular ultrasound
- Visual field testing (for functional assessment)
Risks
- Temporary light sensitivity or blurry near vision if dilating drops are used
- Discomfort from bright camera flashes
- Rare reactions to dilating drops such as increased eye pressure, headache, or rapid heartbeat
- Very rare allergic response to eye drops
Contraindications
- Known allergy or sensitivity to dilating eye drops
- History or risk of angle-closure glaucoma triggered by dilation
- Recent eye surgery where dilation is restricted per clinician guidance
- Inability to tolerate bright light or to keep eyes open for imaging
Recovery Timeline
What to expect during your recovery
Most people return to normal activities right away. If dilating drops are used, light sensitivity and blurry near vision usually improve within several hours.
Typical Range
0–1 days
Return to Work
0–1 days
Recovery Milestones
Resume routine indoor activities
Use sunglasses outdoors until dilation effects fade
Drive once vision and light sensitivity return to your normal
Return to detailed near tasks (reading, screens) when vision is comfortable
Frequently Asked Questions
Common questions and expert answers about this procedure
What does fundus photography show?
What does fundus photography show?
It captures color images of the retina, macula, optic nerve, and blood vessels. These photos help detect and track conditions like diabetic retinopathy, macular degeneration, and glaucoma changes.
Will my eyes need to be dilated?
Will my eyes need to be dilated?
Some cameras work without dilation, but drops are sometimes used to get clearer, wider views. The decision depends on your eyes and the equipment in the clinic.
How long does the test take?
How long does the test take?
The photo itself takes seconds per eye. If dilation is needed, allow extra time for the drops to work before imaging.
Is the test safe?
Is the test safe?
It is noninvasive. The main discomfort is bright flashes. If drops are used, expect temporary light sensitivity and blurry near vision. Serious reactions are rare.
Can fundus photos replace a full eye exam?
Can fundus photos replace a full eye exam?
They are a useful tool but do not replace a comprehensive dilated eye exam. Clinicians often use photos alongside an exam and other tests.
What conditions can it help detect or monitor?
What conditions can it help detect or monitor?
Diabetic retinopathy, macular degeneration, retinal vascular disease, optic nerve changes related to glaucoma, and other retinal problems.
How is fundus photography different from OCT?
How is fundus photography different from OCT?
Fundus photos are surface images of the back of the eye. OCT takes cross-sectional scans that show retinal layers and swelling in more detail.
Can it be done as part of telehealth screening?
Can it be done as part of telehealth screening?
Yes. Photos taken in a clinic or community setting can be sent securely to an eye specialist for review, especially for diabetic eye screening.
References
Medical literature and sources