In most major American cities, the price for a single MRI can vary by $3,650 or more. Stop treating medical costs like the weather—unpredictable and unavoidable. A fundamental shift is happening. This guide is your step-by-step playbook.
We are conditioned to treat medical costs like the weather: something that happens to us, unpredictable and unavoidable. We receive a referral for an MRI, we go where the doctor suggests, and we wait six weeks for a “Summary of Benefits” to arrive in the mail like a ransom note.
But there is a fundamental shift happening. Thanks to new price transparency laws, healthcare is becoming a “shoppable” service. The problem is that while the data is now public, it isn’t always “readable.”
If you are standing in a doctor’s office with a referral for an MRI in your hand, you aren’t looking for a spreadsheet; you’re looking for a strategy. This guide is your step-by-step playbook for using HealthFees.org to find the real price of your care before you ever set foot in the imaging center.
The “Information Gap” and Why it Costs You Thousands
Before we dive into the data, you must understand the “Price Delta.” In almost every major American city, the price for the exact same MRI—using the same machine, read by a similarly qualified radiologist—can vary by as much as 400% to 1,000%.
A Brain MRI might cost $550 at an independent imaging center three miles away, while the hospital-owned facility across the street charges $4,200 for the same procedure. If you haven’t met your deductible, that $3,650 difference comes directly out of your bank account.
To bridge this gap, you need to move from being a “patient” to being a “health consumer.”
Step 1: Secure the “Golden Key” (The CPT Code)
Data explorers and price transparency tools are built on a language called Current Procedural Terminology (CPT). These are five-digit codes that tell insurance companies exactly what happened during your visit.
If you search for “MRI,” you will get hundreds of results. Is it with contrast? Without contrast? Is it of the lumbar spine or the cervical spine? Each variation has a different price.
Your Action Item: Before you leave your doctor’s office, do not just take the paper referral. Ask the administrator: “What is the 5-digit CPT code for this specific imaging order?”
Common MRI CPT Codes:
- 70551: MRI of the brain, without contrast.
- 72141: MRI of the lumbar spine, without contrast.
- 73721: MRI of a lower extremity joint (like a knee), without contrast.
Once you have this code, you are no longer guessing. You have the “Golden Key” that unlocks the data on HealthFees.org.
Step 2: Navigating the HealthFees Data Explorer
Now that you have your CPT code, go to the Compare Prices or Data Explorer page.
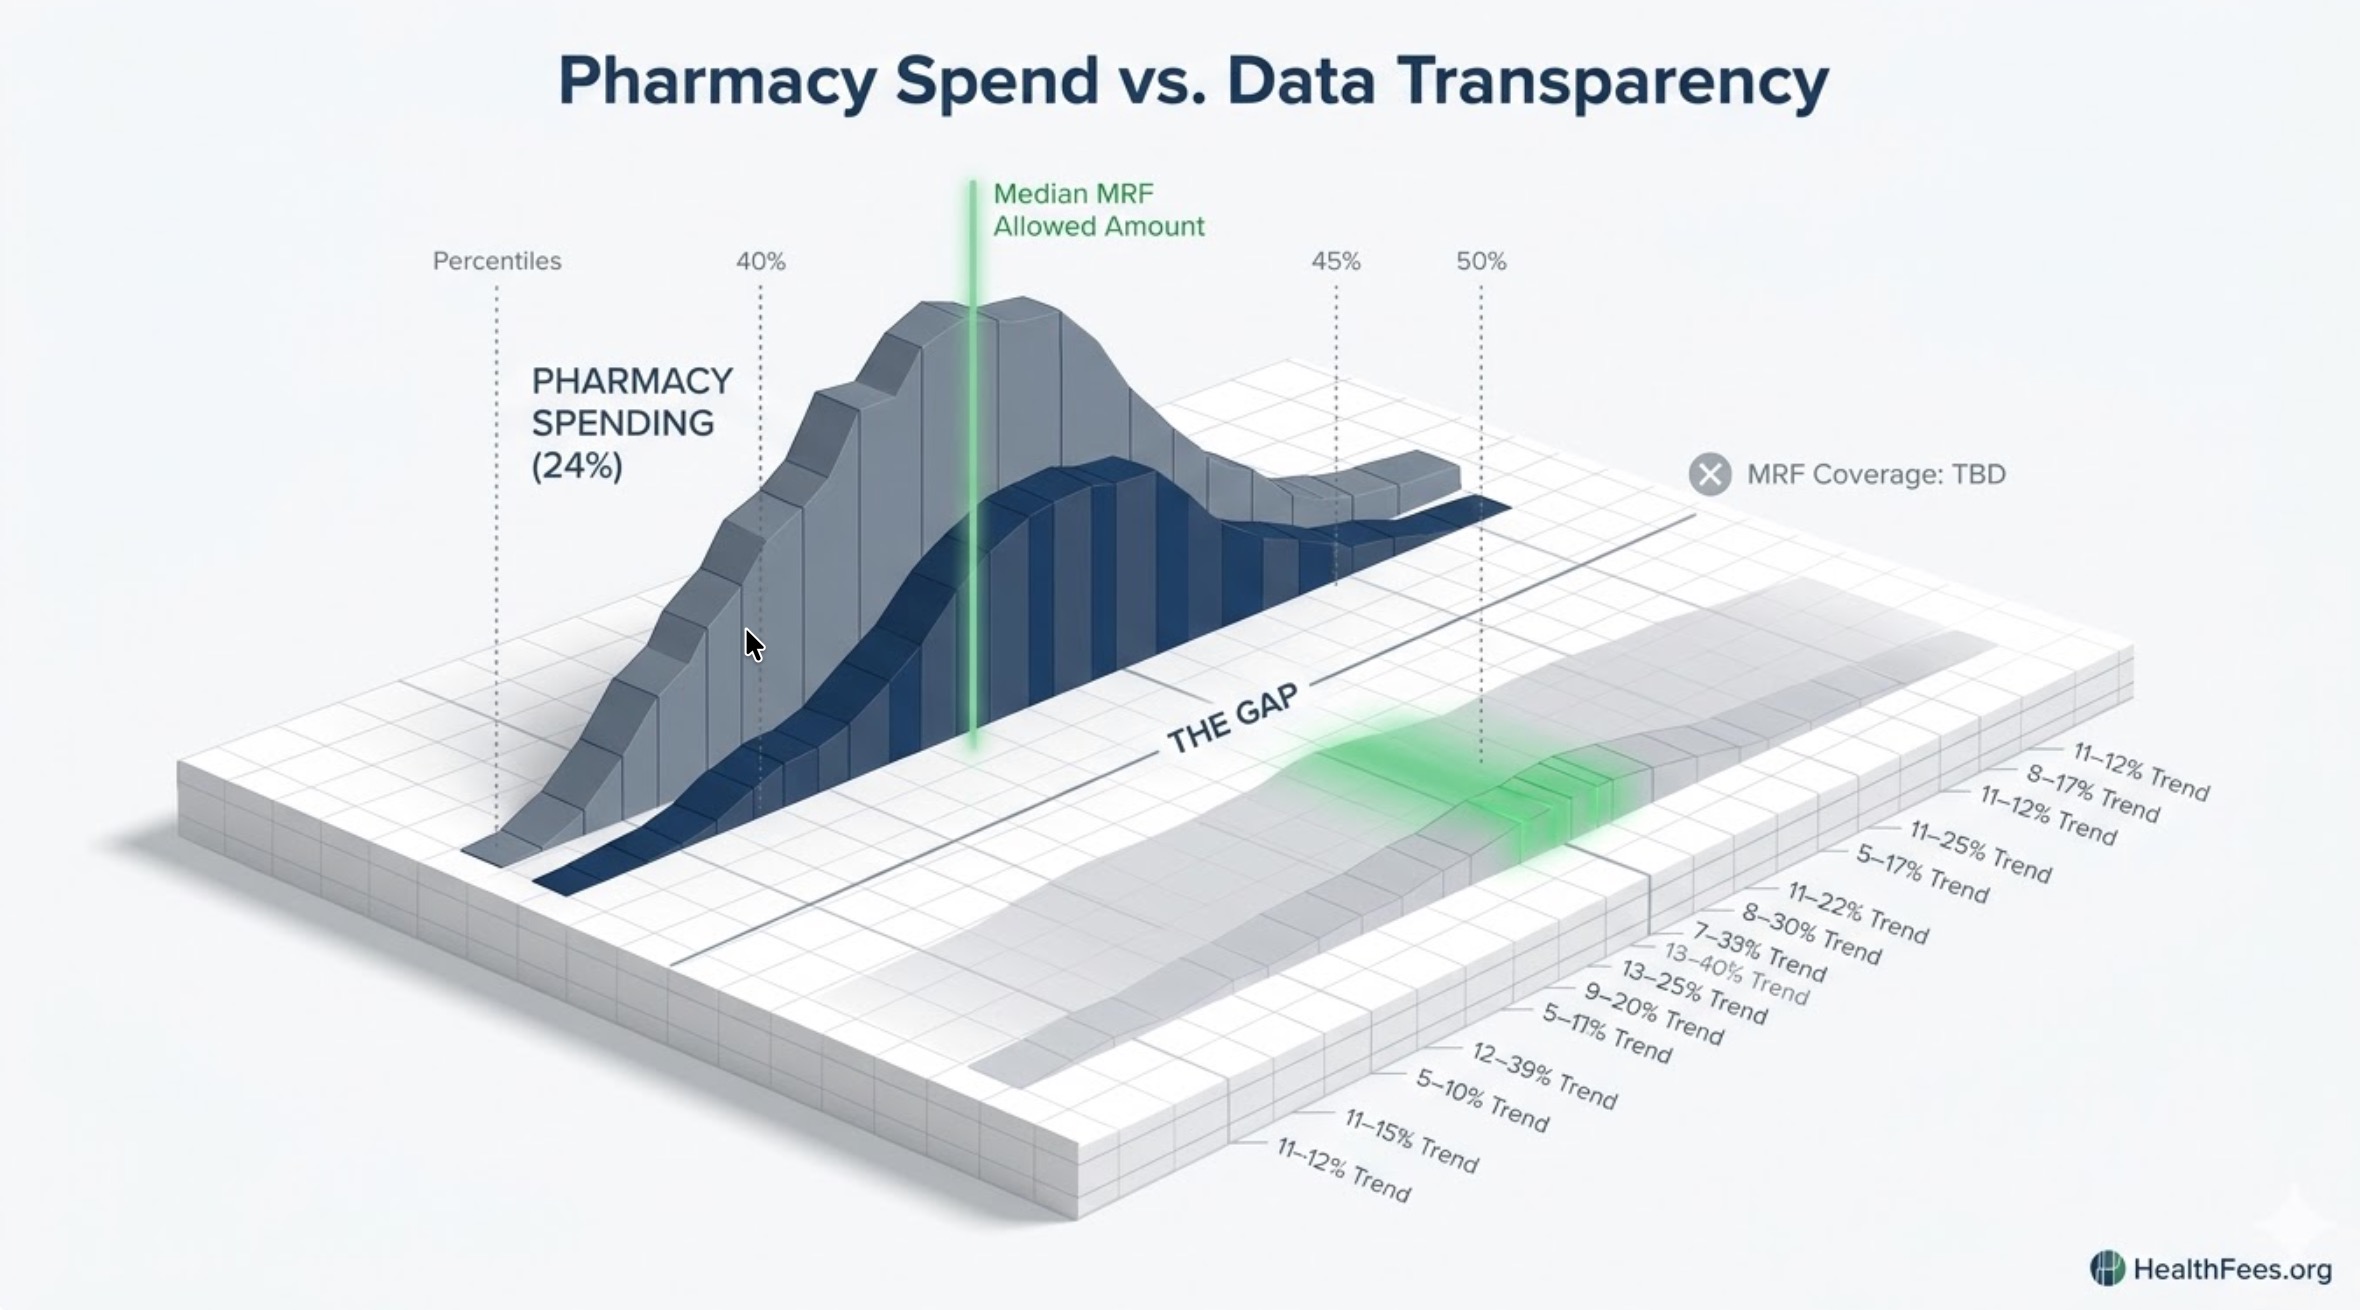
Many users see the initial data visualizations—such as the road safety demos or placeholder charts—and feel a moment of “data vertigo.” It is important to remember that these visualizations are the “engine” of the site. They demonstrate how we can filter and sort massive amounts of information.
How to Search:
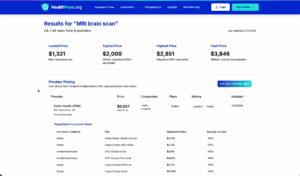
- Input your Zip Code: Prices are hyper-local. A facility 20 miles away might be in a different “market” with significantly lower negotiated rates.
- Enter your CPT Code: Instead of typing “Back MRI,” type “72141.”
- Identify your Payer: Are you paying “Cash” (Self-Pay), or are you using a specific insurance provider like Blue Cross Blue Shield or Cigna?
The tool will generate a list of facilities. You aren’t just looking for the lowest number; you are looking for the negotiated rate. This is the actual price your insurance company has agreed to pay the provider. If you have a high-deductible plan, this is the number you will likely be responsible for.
Step 3: Independent vs. Hospital-Based Facilities
As you scroll through your results, pay close attention to the names of the facilities. This is where the most significant savings are found.
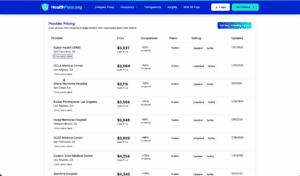
- Hospital Outpatient Departments (HOPD): These facilities often carry high “facility fees” to cover the overhead of maintaining a 24/7 emergency room and trauma center. Even if the MRI is in a separate building down the street, if the hospital owns it, you will pay hospital prices.
- Independent Imaging Centers: These are “freestanding” clinics. Because they don’t have the overhead of a surgical hospital, their prices are almost always the lowest in the market.
The Strategy: If your HealthFees search shows an independent center with a $600 negotiated rate and a hospital with a $2,800 rate, you now have the leverage to ask your doctor to send the referral to the more affordable location.
Step 4: The “Verification Call” Script
Data transparency is a massive leap forward, but the “Ground Truth” still lives in the billing office of the provider. Data can lag or contracts can change. Once you’ve identified a low-cost facility on HealthFees, you must verify it.
Many patients are intimidated by hospital billing departments. Use this script to stay in control:
“Hi, I need to schedule an MRI for CPT code 70551. I have been researching negotiated rates on a transparency tool. I see that your negotiated rate for [Your Insurance Company] for this code is listed in your price list at [Amount]. Can you confirm if that is currently accurate, and if there are any additional facility fees I should be aware of?”
By leading with the CPT code and the price you already know, you signal to the billing representative that you are an informed consumer. They are much less likely to give you a “vague estimate” when you are holding the data in your hand.
Step 5: Decoding the “Data Explorer” Visuals
When you visit the Data Explorer page, you may see complex scatter plots or bar charts. If you see a demo involving “United Kingdom Road Safety,” don’t be alarmed—this is a “Logic Demo.”
Think of it as a “Sandbox.” We use these datasets to show you how the site can handle millions of rows of data simultaneously. In the same way that we can show you every traffic accident in London by time of day, we can show you every MRI price in Chicago by insurance provider.
When you switch the dataset to Medical Pricing, use the “Legend” on the side of the chart.
- The Y-Axis usually represents the Price.
- The X-Axis represents the Provider.
- The Bubbles/Dots represent individual Contracts.
If you see a cluster of dots at the bottom of the chart, that is your target zone. Those are the providers who have consistently lower negotiated rates across multiple insurance plans.
Conclusion: Knowledge is the Best Medicine
Price transparency doesn’t just save you money; it reduces the “medical anxiety” that keeps people from seeking care. When you know that an MRI will cost exactly $640—and you have the data to prove it—the “waiting for the bill” stress disappears.
You have the tools. You have the CPT codes. You have the data. The next time a doctor hands you a referral, don’t just say “Thank you.” Say “I’ll check the prices and let you know where to send the order.”
You are in charge now.
Disclaimer: HealthFees.org provides data for educational and transparency purposes. Always confirm final pricing with your insurance provider and medical facility before undergoing a procedure.